

If you’ve ever hosted outside and felt like you were doing laps, running from the grill to the kitchen, weaving around furniture, hunting for a place to set a drink then you already know the secret: a great backyard isn’t just pretty. It’s organized.
At Aqua 4 Outdoor, we like to think of a backyard like a home’s interior: it works best when it’s made of “zones” that each have a purpose, and when those zones connect with clear, comfortable pathways. The result is a space that feels easy, welcoming, and naturally social whether you’re hosting a crowd or enjoying a quiet weeknight dinner outside.
Below are practical, homeowner-friendly layout ideas to help your backyard entertaining zones flow beautifully.
Start with the big picture: how do you actually entertain?
Before you place a single chair, take a minute to picture how you want the day (or evening) to unfold. The best layout isn’t the one with the most features, it’s the one that matches your habits.
Ask yourself:
- How many people do you typically host? Just family, or groups of 10–20?
- What do you do most? Grill and dine? Lounge with drinks? Watch games? Swim?
- Do kids or pets need a play lane? (This impacts traffic flow in a big way.)
- Where do guests naturally enter? From the back door, a side gate, or the driveway?
- What time do you use the yard? Morning coffee, afternoon pool time, evening dinners-each one has different shade and lighting needs.
This quick “entertaining profile” helps you prioritize the right zones and keeps the layout from feeling cluttered.
Think in zones (not scattered furniture)
When backyards feel disjointed, it’s usually because furniture is floating around without clear boundaries. Zones create that “Oh, this is where we hang out” feeling.
Most entertaining-friendly yards include a mix of these core zones:
- Cooking zone (grill, outdoor kitchen, prep space)
- Dining zone (table + chairs, buffet surface)
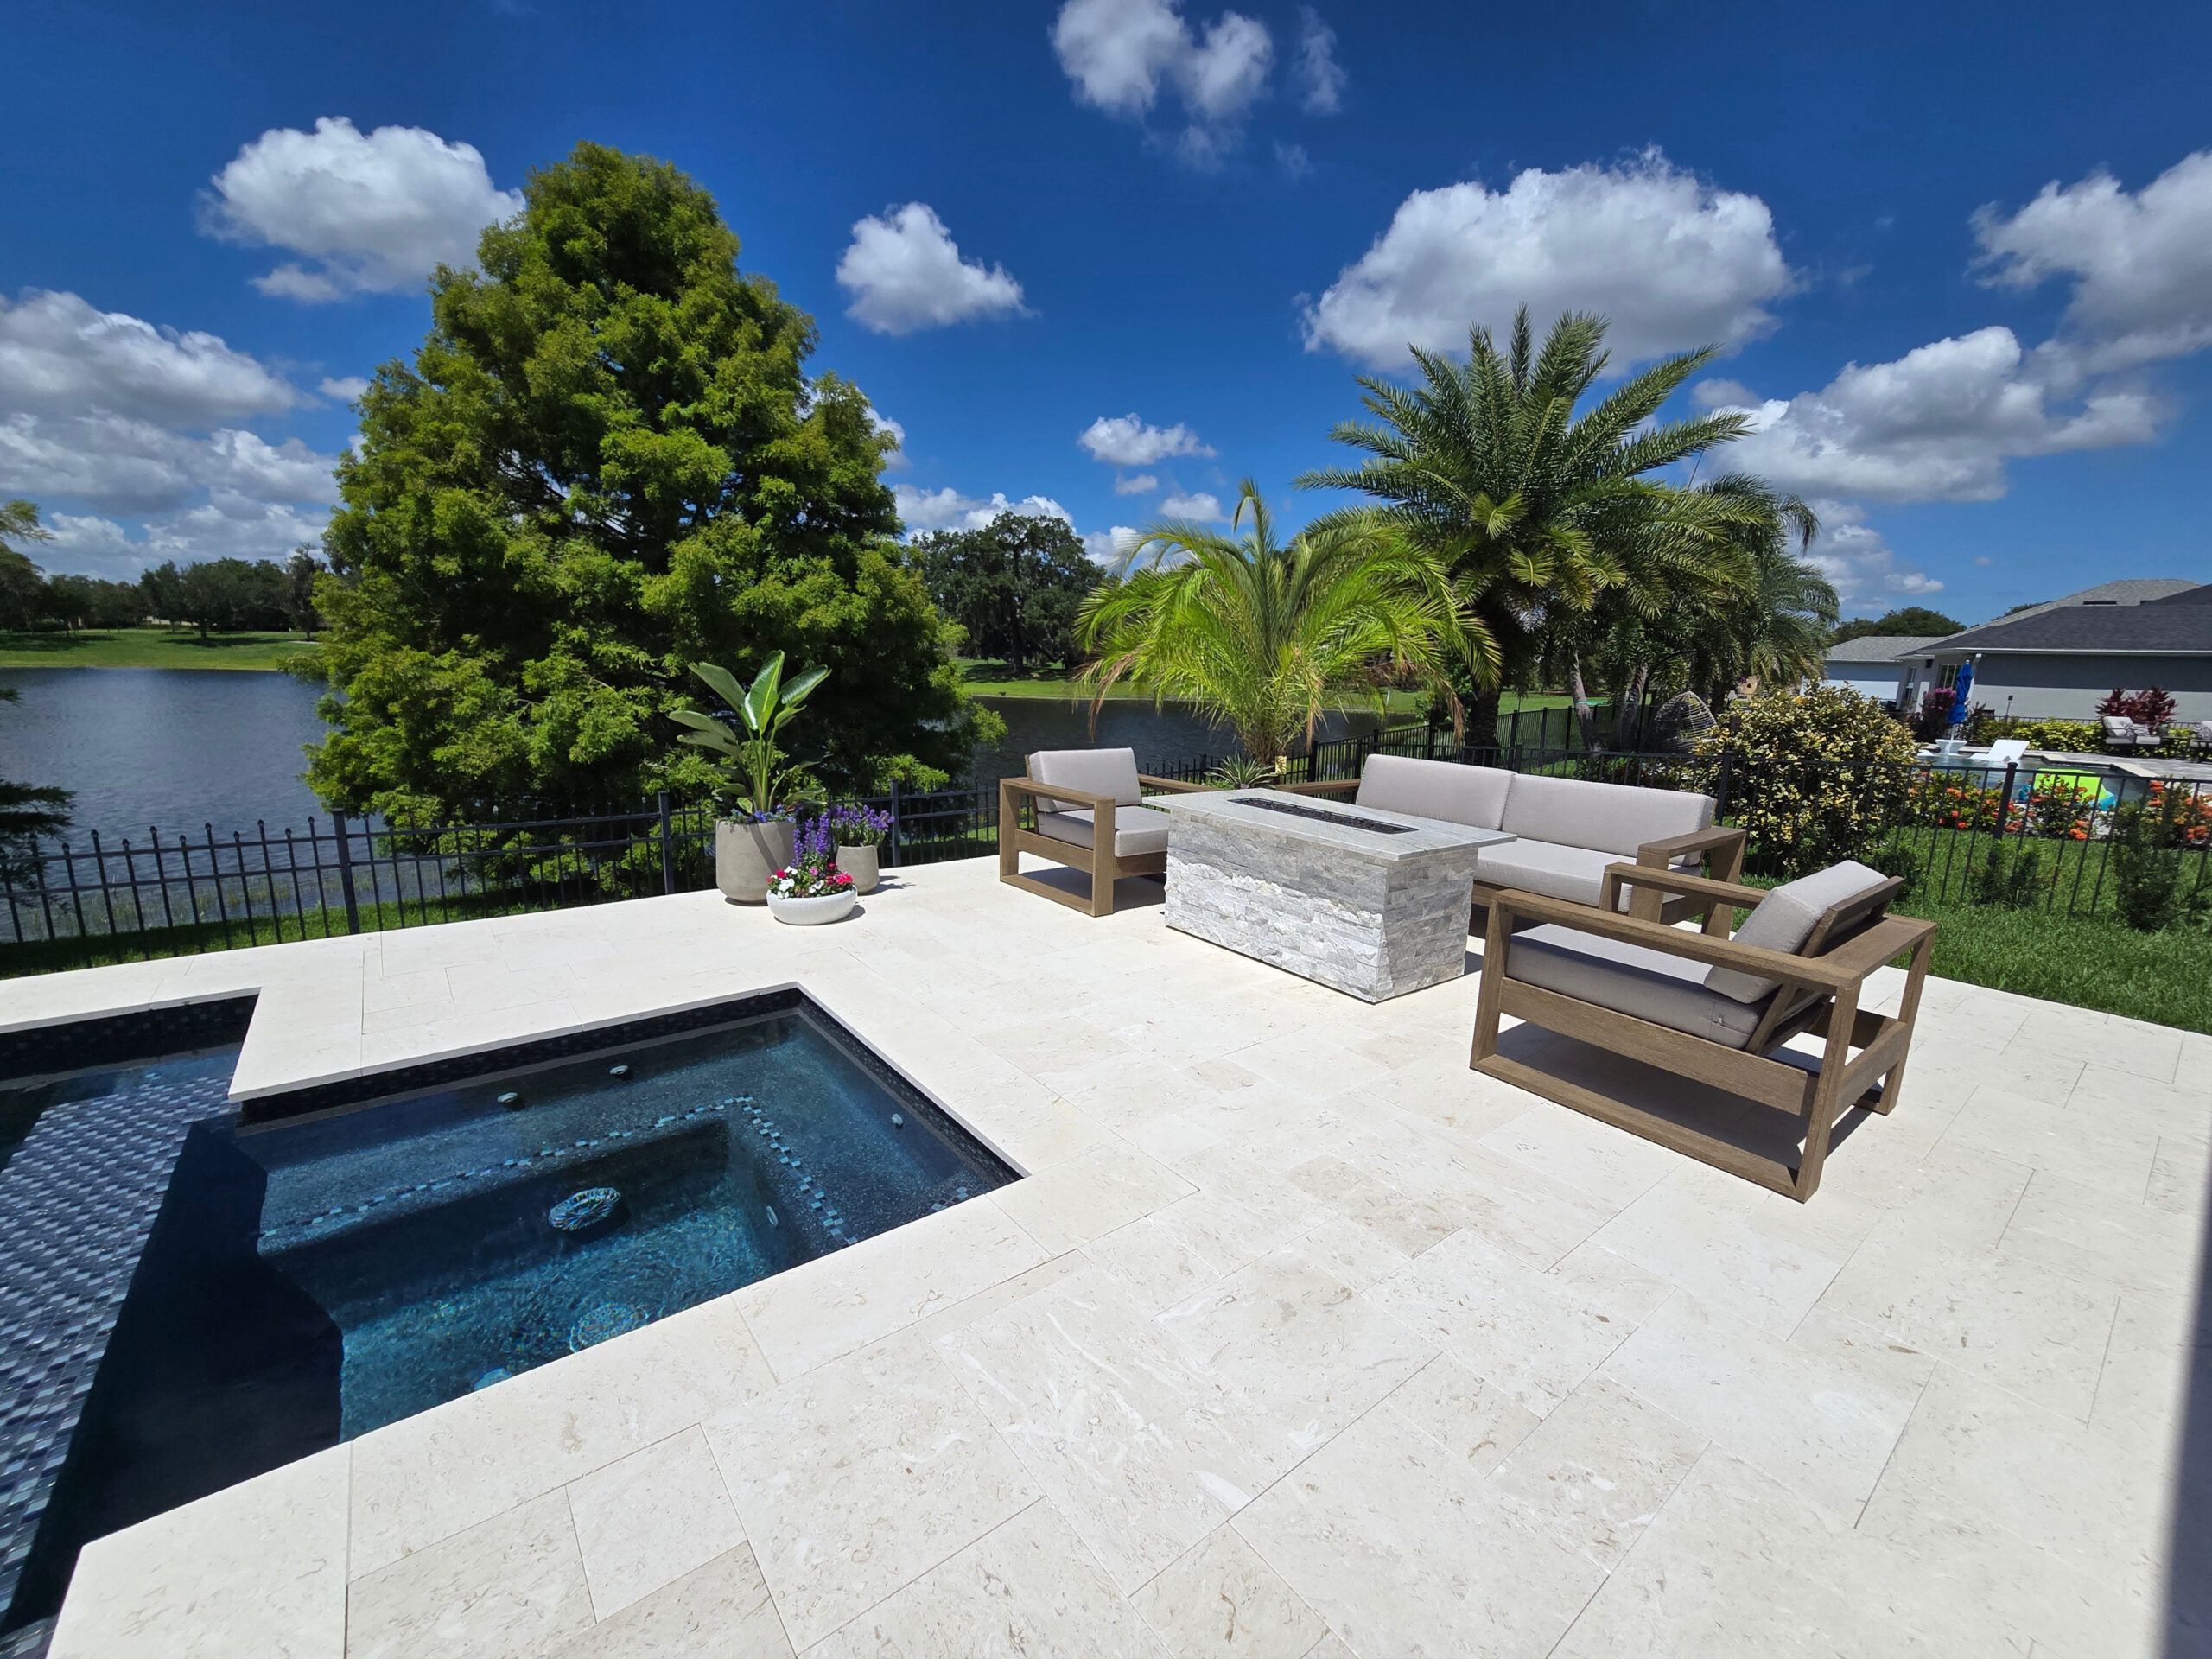
- Lounge zone (sofas, fire feature, conversation seating)
- Pool or play zone (if applicable)
- Transition zone (pathways, stepping stones, “landing” areas)
Not every backyard needs all of them. A smaller yard might combine dining and lounging. A larger yard might add a bar zone, a spa nook, or a lawn game area.
Layout rule #1: place the “action zones” closest to the house
This one simple move makes entertaining feel effortless: keep the areas that need the most back-and-forth near your main entry.
Typically, that means:
- Cooking and dining closest to the kitchen door
- Lounge just beyond dining (close enough to feel connected, far enough to feel like a change of scene)
- Quiet corners (reading nook, spa, small bistro table) farther out where it feels more private
Why it works: You’ll carry food and drinks less, guests find the “main party” faster, and the flow feels natural, like an open-concept floor plan, but outdoors.
Layout rule #2: design a clear circulation path (so guests don’t cut through conversations)
Flow is really about movement. When people don’t have a clear way to get from point A to point B, they’ll walk wherever there’s space which often means straight through your seating area.
As a guiding principle, try to create:
- A main route from the back door to the entertaining hub (dining/cooking)
- A secondary loop that lets people reach the grill, the drinks, the pool, or the gate without squeezing behind chairs
Easy homeowner test: Imagine you’re carrying a tray of burgers from the grill to the table. Is there a direct path? Can someone pass you without bumping elbows? If not, adjust spacing or furniture placement.
Simple spacing tips that make everything feel better
- Give chairs room to slide out. If chairs constantly hit a wall, planter, or another chair, the area feels tight fast.
- Avoid “pinch points.” If a walkway narrows between a sofa and a railing, people will hesitate and that creates traffic jams.
- Keep service routes open. Leave a comfortable line from grill → prep area → dining table → back door.
You don’t need to measure every inch, but you do want that relaxed, unforced movement that makes guests linger.
Use “outdoor room dividers” to define zones without closing things off
Zones don’t have to be separated by walls. In fact, the best entertaining yards feel connected. Use subtle dividers that guide the eye and signal purpose.
Some of our favorite zone definers:
- Rugs (outdoor rugs instantly anchor a lounge area)
- Pavers or a change in material (for example: paver patio for dining, decomposed granite or stepping stones to a fire pit)
- Planters and greenery (a low hedge or row of planters can “frame” a space)
- Pergolas and shade structures (a pergola over dining makes it feel like a destination)
- Lighting (string lights over lounge, path lights along walkways, task lighting at the grill)
- Built-in benches or seat walls (great for defining edges while adding extra seating)
Benefit: Your backyard feels intentionally designed, not like furniture was simply set outside.
Three entertaining layouts that flow (with examples)
Not sure how to arrange it all? Here are three go-to layouts we recommend often, with notes on why they work.
1) The “Kitchen Extension” layout (best for frequent dining outside)
How it’s arranged: Outdoor kitchen/grill + prep area near the back door, dining table just beyond, lounge zone adjacent (not behind).
Why it flows: It mirrors how you use your indoor kitchen and dining room: everything is close, convenient, and social.
- Place the grill and prep where the cook can still talk to guests.
- Add a serving ledge or console between cooking and dining for platters and drinks.
- Keep the lounge close enough that people can drift between zones without feeling like they’re “leaving the party.”
Real-life example: A family of five hosts Sunday dinners. We’d place a rectangular dining table under a pergola, with a compact outdoor kitchen along one edge. A small conversational seating set sits a few steps away with a fire table perfect for dessert and after-dinner chats.
2) The “Party Loop” layout (best for groups and mingling)
How it’s arranged: Zones form a loop: entry → drinks station → lounge → dining → grill → back to entry.
Why it flows: Guests can circulate naturally without dead ends, and no single zone becomes overcrowded.
- Create a drink station early in the path (cooler, beverage tub, small counter).
- Keep the grill slightly off the main walkway so the cook isn’t in the middle of traffic.
- Provide standing spots (bar-height table, ledge, or cocktail tables) for guests who prefer mingling over sitting.
Real-life example: For a couple who hosts neighborhood get-togethers, we’d place a bar-height counter near the kitchen door, a lounge cluster around a fire feature, and dining off to the side connected by a continuous paver path that gently guides movement.
3) The “Resort Zones” layout (best for pools and all-day use)
How it’s arranged: Pool zone is central, with lounging and dining positioned to feel like destinations around it, plus a quiet corner away from the splash.
Why it flows: Wet and dry activities stay organized, and people can choose their vibe: sun, shade, food, or quiet.
- Place chaise lounges where you get the best sun (but offer a shaded option nearby).
- Keep dining a little back from the pool edge to avoid constant splashes on food.
- Create a towel + rinse routine (outdoor shower or a simple towel cabinet/bench near the transition).
Real-life example: A backyard with a pool might include a sun shelf lounge area, a shaded dining pergola a few steps back, and a fire pit with deep seating farther away for evening gatherings; each zone connected by a clear, slip-resistant walking route.
Don’t forget the “support stations” that make hosting easy
These small features are the difference between a backyard that looks good and one that feels effortless to use.
- Drink station: a bar cart, built-in counter, or small sideboard with cups, napkins, and a beverage tub
- Landing zones: side tables near every seating group (people need a place for plates and glasses)
- Trash + recycling: discreet but accessible (especially near cooking and dining)
- Storage: cushions, pool towels, outdoor games-keep it close so setup and cleanup are quick
- Kid/pet corner: a small lawn area or designated play spot helps protect the “adult” hangout zones
Hosting benefit: You’ll spend less time managing the space and more time enjoying your guests.
Use lighting to “stitch” zones together after sunset
Even the best layout can feel choppy at night if only one area is lit. Think of lighting as the thread that connects each zone.
A simple layering approach:
- Path lighting to guide movement between zones
- Task lighting at the grill, serving area, and any steps
- Ambient lighting (string lights, sconces, soft overhead fixtures) for warmth
- Accent lighting to highlight trees, planters, water features, or a beautiful wall
When each zone has its own glow and the path between them is clear your backyard feels bigger, safer, and more inviting.
Make comfort part of the layout (shade, wind, and “where the sun actually hits”)
Flow isn’t just where you walk; it’s where you want to stay. The most-used zones are the ones that feel comfortable.
Quick comfort checks
- Shade: If dining is in full sun at 6 p.m., it won’t matter how pretty it is. Consider umbrellas, pergolas, shade sails, or strategic trees.
- Wind: If your yard gets breezy, tuck the lounge area near a fence line, greenery, or a low wall that helps block gusts.
- Heat: Choose cooler materials underfoot in sunny areas and add shade where people sit the longest.
- Noise: A small water feature can soften neighborhood sounds and make conversation feel more intimate.
Comfort is what turns “nice backyard” into “we use this every day.”
Practical step-by-step: plan your zones in one afternoon
If you want a straightforward way to map this out, try this simple process before buying furniture or starting a project.
Step 1: Sketch your yard (no artistic skills required)
Draw the basic outline: house, doors, existing patio, pool (if you have one), trees, and fence lines.
Step 2: Mark your natural traffic lines
Draw where people walk now ie) from door to grill, door to gate, door to pool. These are your “desire paths.” Your design should support them, not fight them.
Step 3: Place your primary zone first
Choose the #1 activity (usually dining or lounging) and place it where it makes the most sense for access, shade, and views.
Step 4: Add adjacent zones
Put cooking near dining. Put lounging near (but not blocking) dining. Add a drinks station where it’s easy to reach.
Step 5: Define edges
Add simple dividers: a rug, planters, a change in paving, or a pergola. This is where the design starts to feel intentional.
Step 6: Walk it
Literally walk the route. Pretend you’re carrying a platter, chasing a toddler, or greeting guests at the door. Adjust until it feels natural.
Common flow mistakes (and easy fixes)
Mistake: The grill is too far from everything
Fix: Bring cooking closer to the entertaining hub or add a small prep/serving surface near the grill so the cook isn’t isolated.
Mistake: Seating is placed like a waiting room
Fix: Arrange lounge chairs so people face each other, not all in one line. Add a central coffee table or fire feature to create a natural focal point.
Mistake: Dining is stuck in a “pass-through”
Fix: Move the table slightly out of the main walkway, or create a defined path around it so guests don’t squeeze behind chairs.
Mistake: There’s nowhere to put a drink
Fix: Add side tables, a console, a ledge, or a bar cart. It’s a small addition with a big quality-of-life payoff.
Two quick zone combinations we love for real homes
Small backyard combo: Dining + lounge hybrid
If space is tight, choose flexible pieces: a round table that doesn’t feel bulky, and a compact sectional or loveseat set with nesting side tables. Use one strong “anchor” feature like a pergola or rug to make it feel like an outdoor room.
Family-friendly combo: Lounge + play in sight
Create a comfortable lounge area where adults can relax while still seeing the play zone. Define the play area with turf, a small lawn, or a mulch border-something that visually says “this is where activity happens,” so toys don’t drift into every corner.
Bring it all together: a backyard that feels effortless
When your backyard entertaining zones are laid out with intention, hosting feels lighter. Guests know where to go. Conversations happen naturally. The cook stays connected. And you’re not constantly rearranging chairs to make the night work.
If you’re ready to turn “we have a patio” into “we have a backyard we love living in,” Aqua 4 Outdoor can help you plan a layout that fits your home, your style, and the way you really entertain so everything flows beautifully.
No responses yet