

Outdoor lighting is one of those upgrades that pays you back every single evening. It helps guests find their way, makes steps and pathways safer, and gives your home that warm “come on in” feeling. And the best part? You don’t have to choose between safety and style. When lighting is planned with intention, you get both.
At Aqua 4 Outdoor, we like to think of lighting as the finishing touch that makes a yard feel complete. Below are practical, design-savvy ideas you can use to brighten dark corners, highlight your home’s best features, and create a joy-filled outdoor space you’ll actually use after sunset.
Start with a simple lighting plan (before you buy fixtures)
If you’ve ever purchased a few lights and still felt like something was “off,” you’re not alone. Great outdoor lighting is less about how many fixtures you have and more about placing light where it truly helps.
Step 1: Walk your property at night
Do a quick “night audit” with a flashlight. Start at your driveway and walk the route a guest would take: driveway → walkway → front door → back patio. Notice where you hesitate, where shadows fall, and where you’d naturally want a little guidance.
Step 2: Mark the safety zones
These are the spots that deserve lighting first:
- Steps and stair landings
- Changes in elevation (retaining walls, edges of patios)
- Walkways, especially turns and intersections
- Driveway edges and parking areas
- House numbers and mailbox area (for visitors and deliveries)
Step 3: Add “style zones” for atmosphere
Once the essentials are covered, layer in the lighting that makes your yard feel magical:
- Trees and architectural plants
- Stonework, columns, or a beautiful façade
- Outdoor seating and dining areas
- Water features and garden beds
Neighborly tip: Lighting looks best when it’s layered.Think of it like indoor lighting. You want a mix of gentle ambient light, focused task lighting, and a few accent highlights.
Front entry lighting that feels welcoming (and helps everyone see clearly)
Your entry is where safety and curb appeal meet. The goal is a well-lit approach without harsh glare; enough to see faces, keys, and steps, while still feeling warm and inviting.
Ideas to upgrade your front door lighting
- Layer sconces with pathway lights: Wall sconces at the entry give comfortable face-level light, while low path lights guide guests from the sidewalk.
- Light the door hardware and threshold: A recessed downlight under an overhang or a well-placed sconce helps you see the lock and any doorstep changes.
- Show off your home’s character: A subtle pair of lights that grazes stone, brick, or columns can add depth and charm without “spotlight” intensity.
Example: If your front steps are wide and your door is set back in a porch alcove, consider low step lights for each riser plus a warm overhead downlight. It creates a clear, comfortable path and eliminates shadows right where people place their feet.
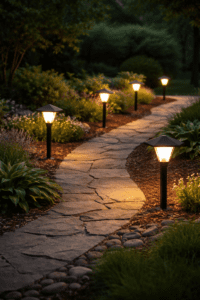
Pathway lighting that guides without looking like an airport runway
Path lighting is a classic for a reason: it’s one of the easiest ways to make your home feel more approachable and safer at night. The trick is spacing and aiming: too many lights (or lights that are too bright) can feel busy and glaring.
How to make path lights look high-end
- Stagger fixtures: Instead of placing lights directly across from each other, alternate sides to create a softer rhythm.
- Light the edges, not the center: You want the boundary of the walkway defined so people naturally stay on it.
- Use warm light for comfort: Warm-toned lighting tends to feel more inviting and blends beautifully with landscaping.
- Prioritize corners and transitions: Put light near turns, steps, and changes in width as these are the places people need visual cues most.
Quick check: When you stand on the walkway, you should be able to see the surface clearly without the fixture itself blinding you.
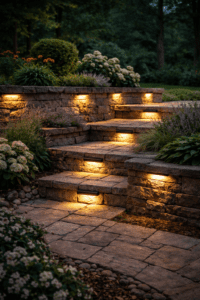
Step, stair, and retaining wall lighting (where safety really shines)
Stairs and edges are the biggest “oops” zones in a yard after dark. Even one step that disappears into shadow can be a hazard. The good news: step lighting can be incredibly beautiful, clean, modern, and subtle.
Smart ways to light steps and elevation changes
- Recessed step lights: Installed on risers or side walls, these create a soft wash across each step.
- Cap lights on retaining walls: A gentle glow along the top of a wall defines the edge and adds a polished look.
- Downlighting from nearby structures: If you have a pergola, eave, or nearby tree, a downward light can illuminate multiple steps naturally.
Design note: Aim for consistent light from top to bottom. A bright top step and dark lower steps can feel disorienting.
Driveway and garage lighting that improves security without harsh glare
Driveways and garages need functional light for backing out safely, unloading groceries, greeting guests, while still fitting your home’s style. The goal is coverage and clarity, not “stadium lighting.”
Driveway lighting ideas homeowners love
- Soft edge lighting: Low lights along the driveway border help define where pavement ends and landscaping begins.
- Garage sconces: Matching sconces on either side of the garage can provide balanced light and elevate curb appeal.
- Downlighting near parking areas: A discreet downlight from an eave or tall mounting point can brighten a wider area with fewer fixtures.
Practical tip: If glare is an issue, look for fixtures with shields or designs that direct light downward. You’ll see better and feel more comfortable pulling in at night.
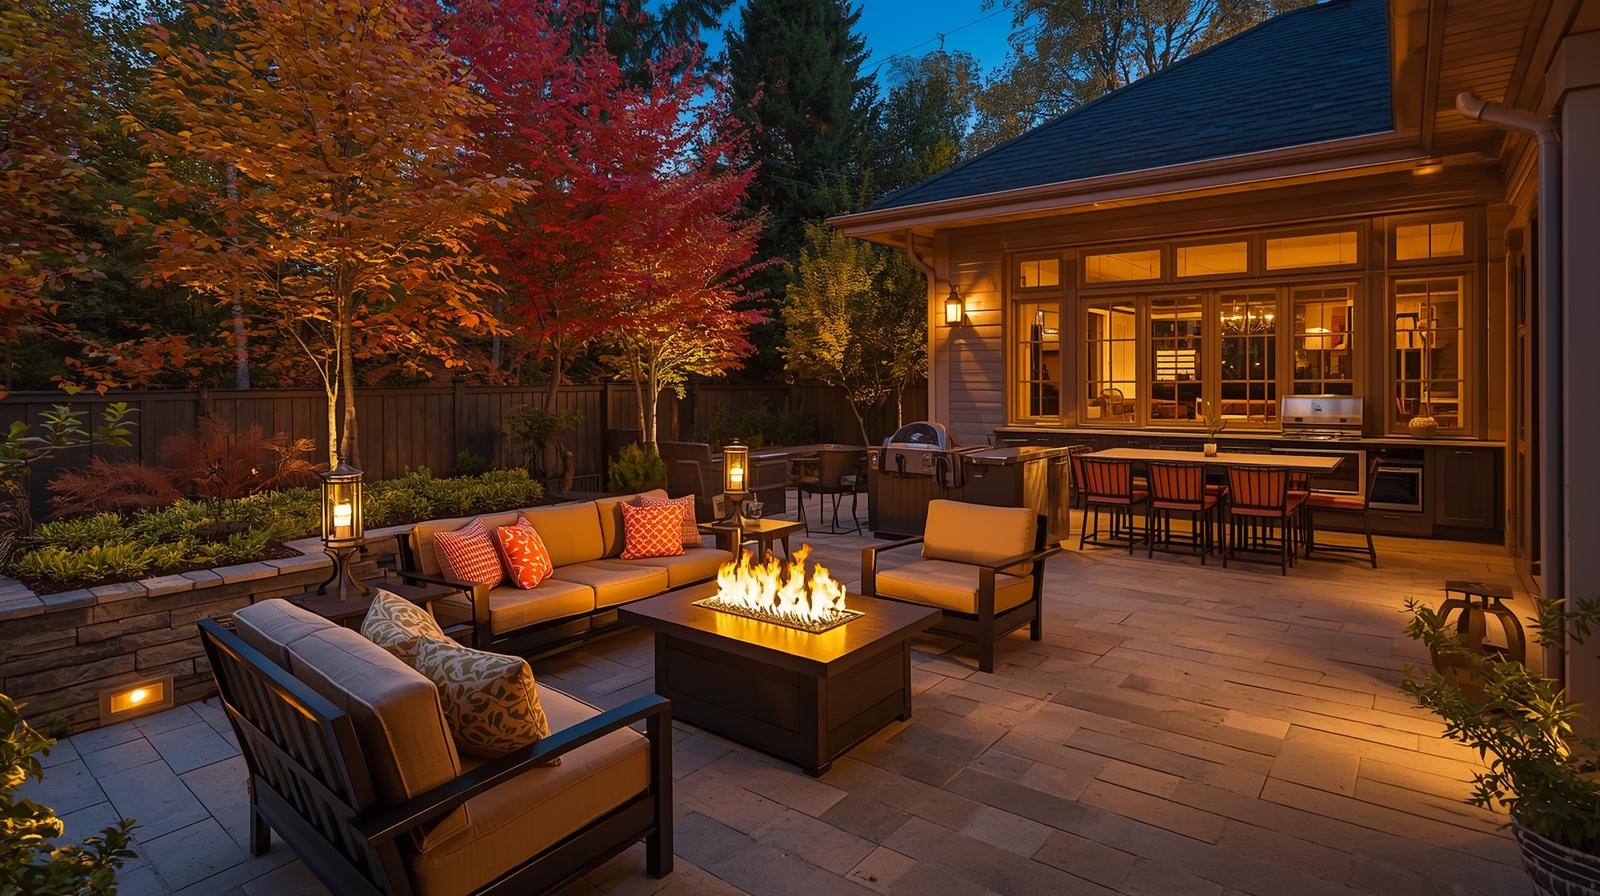
Backyard lighting that extends your outdoor living (and makes it feel magical)
Once the “getting around safely” lighting is handled, backyard lighting is where the fun really starts. Thoughtful lighting makes patios feel like outdoor rooms, highlights landscaping, and invites you to linger a little longer.
Patio and deck lighting ideas
- Perimeter lighting: Lights along the outer edge of a patio or deck help define the space and prevent missteps.
- Stair and railing lights: Perfect for decks: subtle, stylish, and very functional.
- Downlights under a pergola: A few warm downlights can make dining and conversation areas feel cozy and usable.
Outdoor kitchen and grill zone lighting
If you cook outside, you need true task lighting. No one wants to grill in the dark or rely on a phone flashlight.
- Focused downlighting: Place lighting directly over prep surfaces and the grill area.
- Layer in ambiance: Add softer landscape lighting nearby so the kitchen isn’t the only bright spot in the yard.
Example: A patio dining set feels more inviting with a warm downlight overhead plus a few accent uplights on nearby shrubs or a feature tree. Just enough glow to create atmosphere, not so much that it feels like a spotlight.
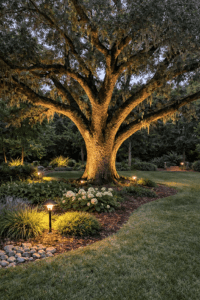
Accent lighting: highlight the features you already love
Accent lighting is the artful side of outdoor lighting. It’s what gives your yard depth and dimension at night turning “black space” into a layered landscape.
What to accent for the biggest impact
- Mature trees: Uplighting a tree canopy can be breathtaking and instantly elevates the entire yard.
- Architectural details: Stone pillars, textured walls, and entry columns look incredible with gentle grazing light.
- Statement plants: Ornamental grasses, agaves, Japanese maples, and sculptural shrubs shine with a carefully placed spotlight.
- Water features: A soft glow on moving water adds sparkle and calming ambiance.
Neighborly tip: Less is often more. Two or three beautifully lit focal points can look more intentional than lighting everything evenly.
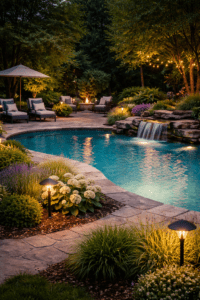
Outdoor lighting for pools and water features: calm, safe, and elegant
Water and lighting are a natural pair especially when your goal is a resort-like backyard. Safety is also a priority around pools, steps, and wet surfaces.
Poolside and water feature lighting ideas
- Illuminate walking routes: Make sure paths to seating, gates, and doors are clearly lit.
- Define edges: Perimeter lighting around patios and raised walls helps everyone see boundaries.
- Highlight water movement: A small light aimed at a spillway or waterfall creates shimmering reflections that feel luxurious.
Comfort tip: Avoid aiming bright lights directly across the water toward seating. Glare is the quickest way to make a beautiful space feel less relaxing.
Lighting controls that make life easier (and keep your home welcoming)
Even the prettiest lighting won’t help if it’s rarely used. Controls make outdoor lighting effortless and that’s when homeowners really start enjoying their space.
Simple control options to consider
- Timers: A classic choice that ensures your lights turn on consistently each evening.
- Dusk-to-dawn settings: Great for entry and driveway lighting when you want dependable nighttime visibility.
- Zones: Separate “front safety,” “back patio,” and “accent” so you can use what you need when you need it.
Practical step: Try setting entry and path lights to come on at dusk, then turn off later at night, while keeping subtle security lighting on longer. This gives you curb appeal when it matters and saves unnecessary brightness overnight.
Common outdoor lighting mistakes (and how to avoid them)
A few small tweaks can make the difference between “fine” and “wow.” Here are the most common issues we see and the easy fixes.
- Too much brightness: If it feels harsh, use fewer fixtures, add shielding, or shift to warmer, softer lighting.
- Glare in the eyes: Aim lights downward or use fixtures designed to hide the light source.
- Even spacing everywhere: Lighting should respond to the landscape. Use more at transitions (steps, corners), less where it’s not needed.
- Only lighting the ground: Add vertical interest by lighting trees, walls, or architectural elements for depth.
- Forgetting maintenance access: Place fixtures where they can be adjusted and kept clear of mulch and plant overgrowth.
A homeowner-friendly approach: a quick 3-phase lighting upgrade
If you want results without feeling overwhelmed, here’s a simple way to phase your project.
Phase 1: Safety essentials
- Front door + house number visibility
- Steps, stairs, and major walkway routes
- Driveway/garage area lighting for parking and unloading
Phase 2: Outdoor living comfort
- Patio/deck perimeter and seating zones
- Outdoor kitchen/grill task lighting
- Gate entries and routes to the backyard
Phase 3: Style and “wow” moments
- Accent lighting for trees and feature planting beds
- Wall grazing for stone/brick textures
- Water feature highlights and garden focal points
This approach keeps your investment focused and ensures every new light has a purpose; either making the space safer, more usable, or more beautiful (often all three).
Final thoughts: light the way to a safer, more beautiful yard
Outdoor lighting is about more than visibility. It’s about creating a home that feels welcoming, polished, and easy to enjoy, whether you’re coming home late, hosting friends, or simply stepping outside to unwind.
If you’re not sure where to start, begin with your entry, steps, and main walkways. Then build outward with layers of light that highlight the landscape you love. With a thoughtful plan and a few well-placed fixtures, your outdoor space can feel just as inviting at night as it does during the day.
Comments are closed